Streamline Client Bookings with Scheduling Request Links

Did you know you can make it even easier for clients to book meetings or sessions with you directly from your email templates?
With Light Blue’s scheduling calendars, you’re already able to let clients book sessions or appointments through your website or marketing campaigns. But for your existing clients, Scheduling Requests offer even more flexibility.
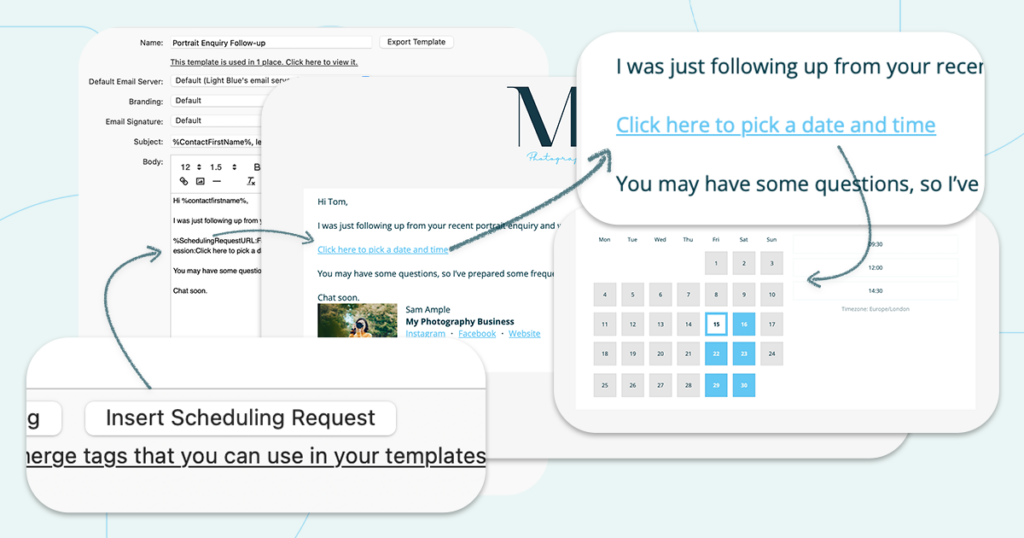
Rather than creating scheduling requests manually, you can insert Scheduling Request Links right into your email and text message templates.

This means you can invite clients to book a meeting or session in just a few clicks. Even better, these templates can be used within your workflows, so scheduling requests are sent automatically at the right time, saving you even more time.
Examples where this is helpful:
- Use a portrait enquiry follow-up email template that invites clients to pick a date and time for their session.
- Send a wedding enquiry an email template that lets clients book a consultation with you.
- Set up an automated email to go out six months after a newborn session, inviting the family to book their next portrait session.
- Schedule an email to be sent a few months before a wedding, asking clients to book their engagement portrait session.
Including scheduling links in your email templates streamlines the booking process, helping you save time and making it easier for clients to book with you.
How to add scheduling request to your email templates
- Create a scheduling calendar for the relevant shoot type/appointment type, if you haven’t done so already.
- Create an email template (or edit an existing one).
- Click on the Insert Scheduling Request button to add a scheduling request link into the template.
- Choose which options you want to use for the scheduling request. You can choose whether to include the booking form or skip it, and if the scheduling request is for a shoot then you can choose whether to create a new shoot or add a session to the shoot you’re sending it from. You can also customise the link text.
- The scheduling request will automatically be linked to the shoot or contact that you send it from.
How to include a scheduling request in a workflow
- Create an email template that includes a scheduling request link (following the steps above).
- Create a workflow (or edit an existing one).
- Add a new step to the workflow (by clicking on the green plus icon)
- Choose the email template.
- Set the offset to choose when the message will get sent.