Search for answers or browse our knowledge base.
Can't find the answer you need here? Contact our support team and we'll gladly help you.
Receive real time leads from Bump2Baby
Click’s Bump2Baby service can send newborn leads to studios in real time. Light Blue’s integration allows those leads to be imported into Light Blue as contacts and (optionally) shoots.
Setting up the integration
Setting up our Bump2Baby integration is a three step process:
- Decide if you want newborn leads to create a contact in Light Blue, or a contact linked to a shoot.
- Set up custom fields in Light Blue.
- Set up the ClickBook dashboard to send newborn leads to Light Blue.
Decide if newborn leads should create a shoot
Some studios prefer to import newborn leads as contacts and only create a shoot when the client makes a booking. Others prefer to import newborn leads as contacts linked to a shoot, and use that shoot to manage the enquiry process. Either option is possible with our Bump2Baby integration.
You can learn more about using shoot enquiry workflows here. Need help deciding which approach is best for you? Get in touch and we’d be happy to help!
Set up custom fields in Light Blue
One of the most important bits of information in a newborn lead is the baby’s expected date of birth. We store this in a custom date field that you must set up before ClickBook can start sending those leads to your Light Blue account.
To do that:
- Open the Preferences / Settings screen in the Light Blue desktop app.
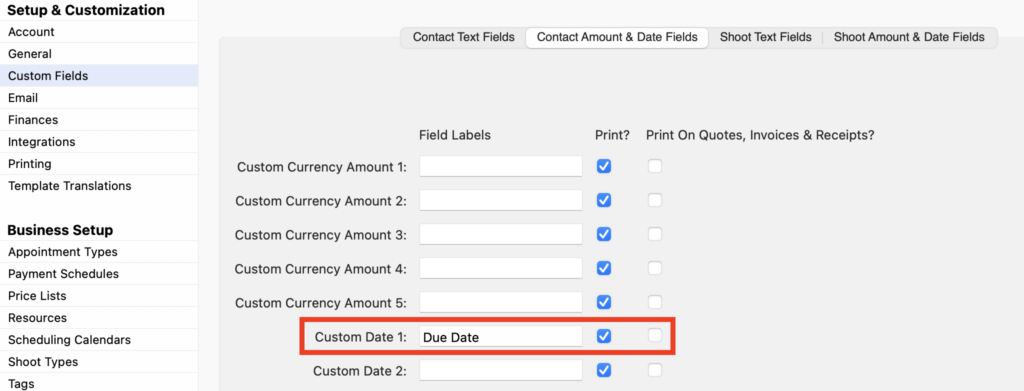
- Go to the “Custom Fields” section.
- If you want ClickBook to create a shoot and a contact for you, you need to set up a custom date field in the Shoots section. In the “Shoot Amount & Date Fields” tab, set one of your available custom date fields to “Due Date”, or whatever wording you want to use.
- If you want ClickBook to just create a contact for you, you need to set up a custom date field in the Contacts section. In the “Contact Amount & Date Fields” tab, set one of your available custom date fields to “Due Date”, or whatever wording you want to use.
- If you already have a custom date field set up to track babies’ dates of birth, you can use that existing custom field: you don’t need to create a new one.

Set up ClickBook to send newborn leads to Light Blue
- Log into ClickBook and click on “Edit Studio Settings”.
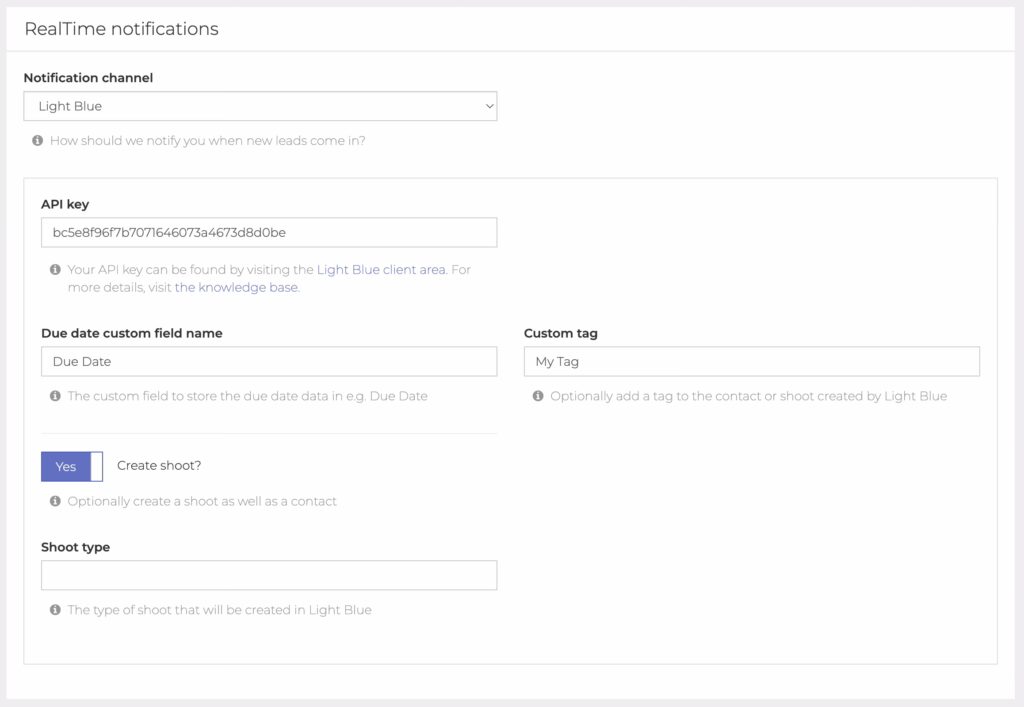
- Go to the “RealTime notifications” section.
- Change the “Notification channel” setting to “Light Blue”.
- If you’ve already entered your Light Blue API key (e.g. because you’re already using other ClickBook services with Light Blue) then it will already appear here. Otherwise, copy your Light Blue API key from the “Integrations” section of the Preferences / Settings screen in the Light Blue desktop app and paste it into the “API key” field in the “RealTime notifications” settings.
- In the “Due date custom field name” field, enter the name of the custom date field (e.g. “Due Date”) where you want to store the baby’s due date in Light Blue.
- If you want Light Blue to create a shoot as well as a contact, change the “Create shoot?” setting to “Yes”. If you do this, you should also specify the type of shoot you want to create when you import newborn leads into Light Blue in the “Shoot type” setting: this should match the name of the relevant shoot type in Light Blue.
- You can also tell Light Blue to automatically apply a tag to newborn leads received from ClickBook. This can be helpful for studios that want to trigger automations for newborn leads.
- Click the “Save” button in the top right corner to apply the new settings.

Importing Bump2Baby newborn leads into Light Blue
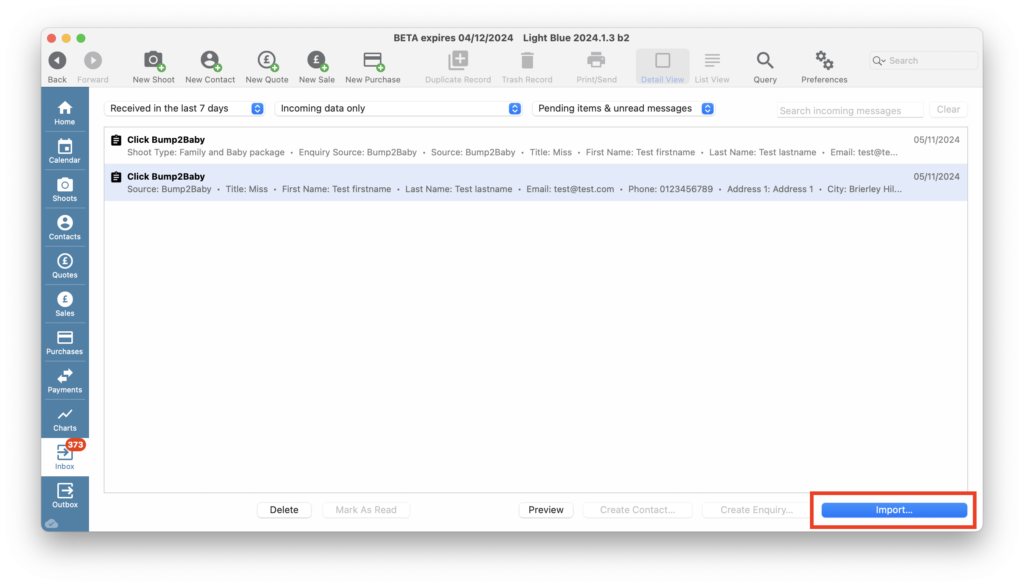
When Light Blue receives a newborn lead from ClickBook, it will appear in the Inbox. To import a lead into Light Blue:
- Select the lead in the Inbox.
- Click the “Import…” button.
- In the window that appears, you can review the lead and either:
- Import it as a new contact, or contact linked to a shoot.
- Use the lead to update an existing contact, e.g. if Light Blue has detected that it might match an existing client.

If you’ve received more than one lead, you can import them as a batch. To do that, select the leads you want to import (e.g. by Shift-clicking to select a range of items, or Command-clicking on a Mac or Control-clicking on Windows to select individual items) and then click the “Import as New Records…” button.