Search for answers or browse our knowledge base.
Can't find the answer you need here? Contact our support team and we'll gladly help you.
🎥 Creating a sale
Sales Records capture the details of the work you’ve carried out for your client and are the first step in the invoice process, i.e. they must be created before you can create an invoice. Sales Records are not included in any financial reporting so are ideal should you need to confirm the details with your client before invoicing them. And of course, using Light Blue for your sales and invoices means your finances, contacts and shoots are all interlinked allowing for comprehensive analysis and reporting.
To learn more about how to do this watch the video below; though if you prefer to learn by words and pictures, have a read of the help article instead!
Creating a sale from a Shoot Record
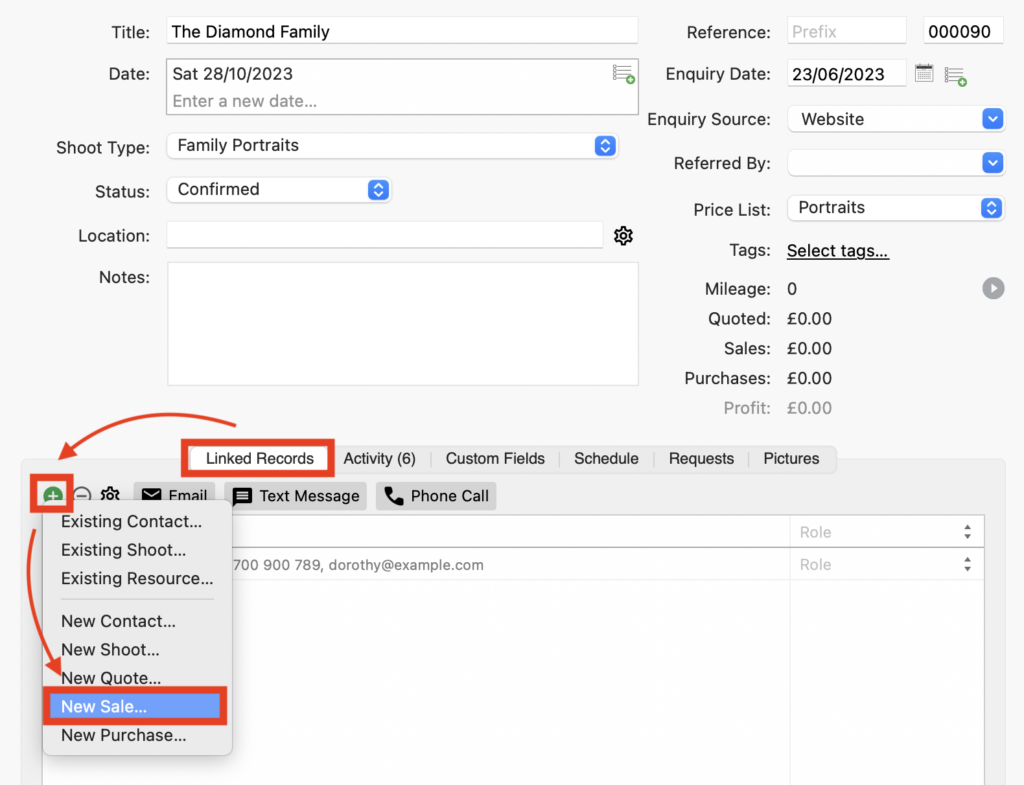
- The quickest way to create a new sale is to head to the “Linked Records” tab in the Shoot Record.
- Click the green “+” button and choose “New Sale…” from the drop-down menu; a new Sale Record is then created and billed to the first linked Contact Record and automatically linked to the Shoot Record.


Adding items
- Click the green “+” button in the “Items” tab to add an Item to your Sale Record.

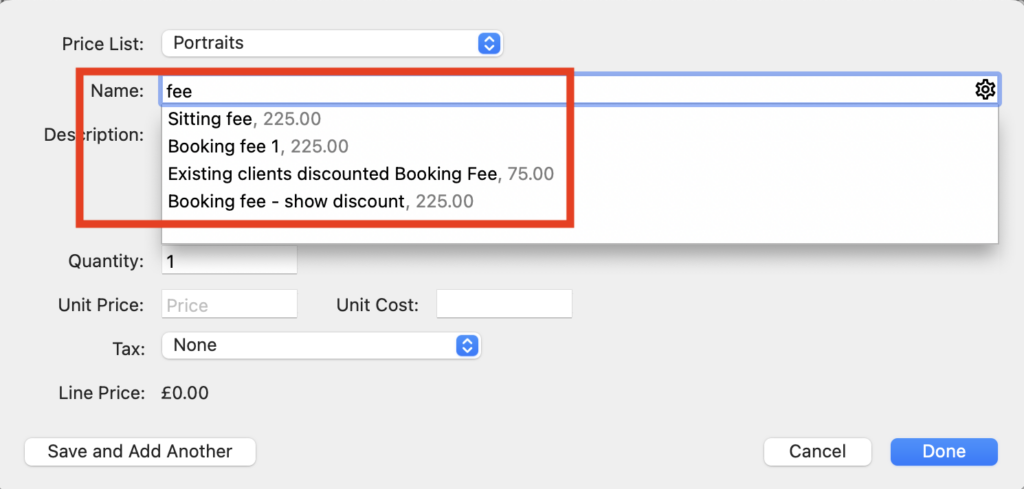
- If you’ve set up Price Lists choose the correct one and add Items by either starting to type the name in the “Name” field or by clicking on the cog to link an Item. 👉 If you’ve not already done so this article explains how to set up Price Lists.

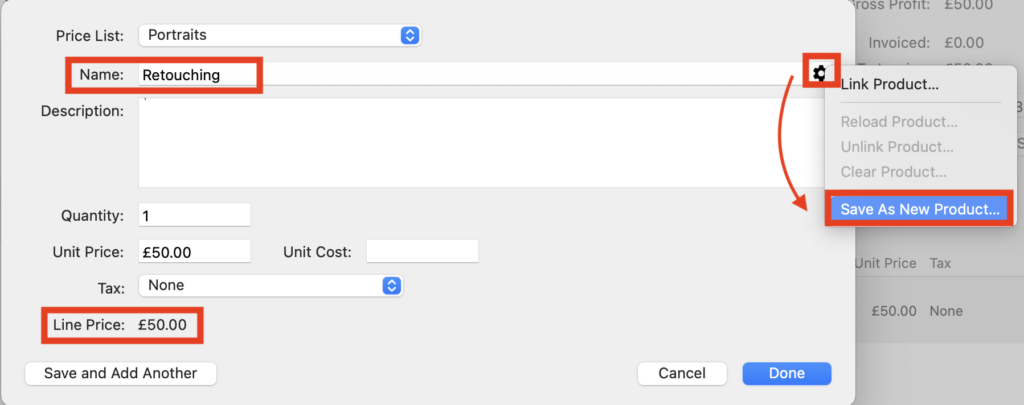
- If you don’t want to use a Price List or the Item you want to add isn’t in a Price List simply type the name and price. NB. If needed you can then add the Item to a Price List by clicking on the cog and selecting “Save as New Product…”.

- If you need to add other Items, click the “Save add Add Another” button and when you’re finished click the “Done” button.

Order Confirmation
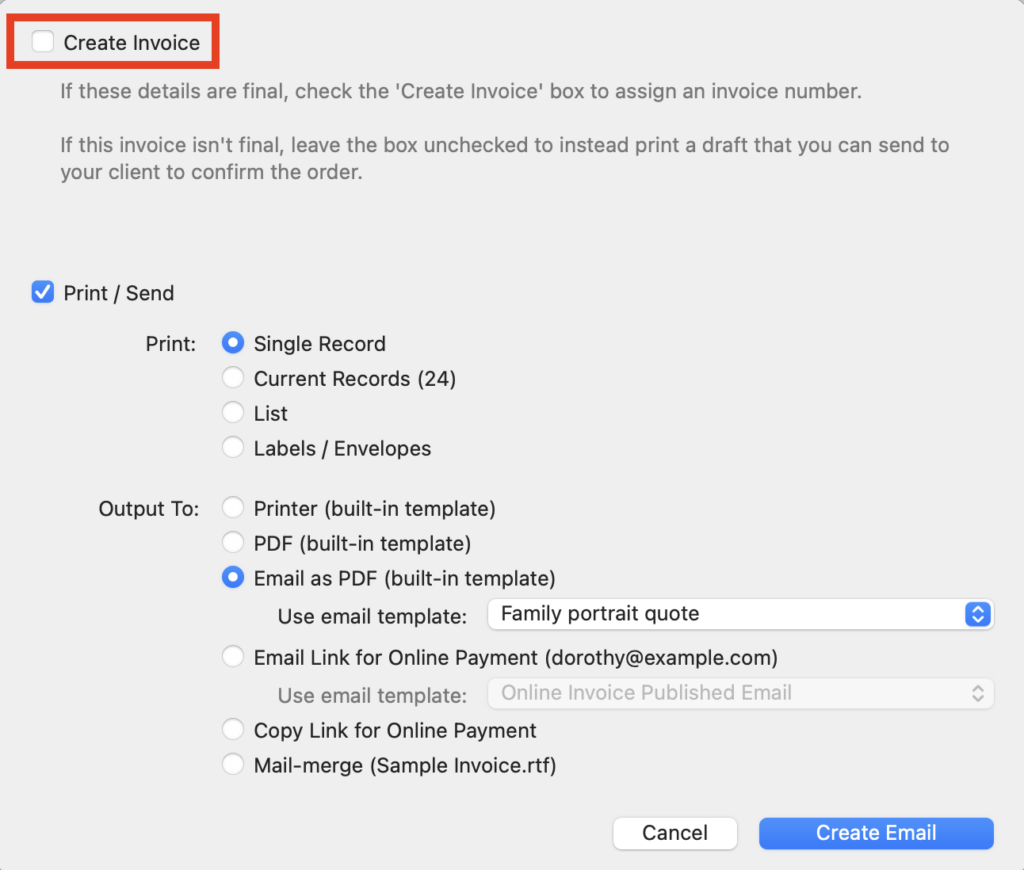
- This step is not necessary but if you do need to send the sale to your client to confirm the details before you invoice them, click on the “Print/Send” button in the main menu bar to either print it, save it as a PDF, or email it to your client as a PDF; you can also choose to use one of your Email Templates with this option. And remember to leave the “Create Invoice” box unchecked!

Creating an invoice from a Sale Record
Optional Extras
👉 If you want to add a discount to the Sale Record find out more here.
👉 Setting up VAT and sales taxes.