Search for answers or browse our knowledge base.
Can't find the answer you need here? Contact our support team and we'll gladly help you.
Importing Shoots & Contacts from a CSV file (spreadsheet)
If you’ve got some existing information about some shoots and associated contact information in a spreadsheet, then it’s possible to import that data in to Light Blue to create records in your database.
You may have exported the data from another system, or have been working in a spreadsheet before using Light Blue. No matter where the information’s come from, just make sure that it’s saved as a .CSV file.
Preparing your file for import
Each column in your spreadsheet can match one of a number of fields within Light Blue. A full list of the fields that you can match is listed at the bottom of this page.
Each row of your spreadsheet relates to a new shoot record. If you also have some contact information in that row, and you’ve matched the relevant columns to contact fields, then Light Blue will create both a shoot record and a contact record for that row, the shoot and contact records will get linked to each other during the import.
Light Blue can only create one contact record per row of your spreadsheet. If you have multiple contacts associated to the shoot, we’d recommend importing the main contact with the shoot information, then import the other contacts separately (as a list of contacts from CSV) and then link those contacts to the relevant shoot manually.
If you need specialist help with importing some data, please contact [email protected]
Dates need to be in the format DD/MM/YYYY, for example 03/10/2021. If your operating system is set to American date formatting and you work with American date formats then dates need to be in the format MM/DD/YYYY, for example 10/03/2021.
Importing the CSV file in to Light Blue
When your file is ready to import, open Light Blue and click on the Records menu. Choose Import > “Shoots & Contacts from CSV” and select your CSV file.
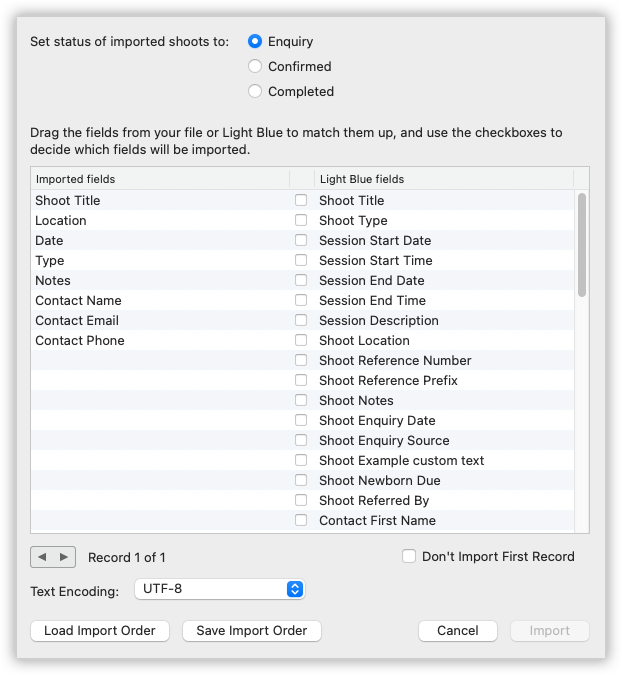
A dialog will appear with a preview of the information from your CSV. On the left hand side are all of the columns from your spreadsheet, on the right are fields within Light Blue.

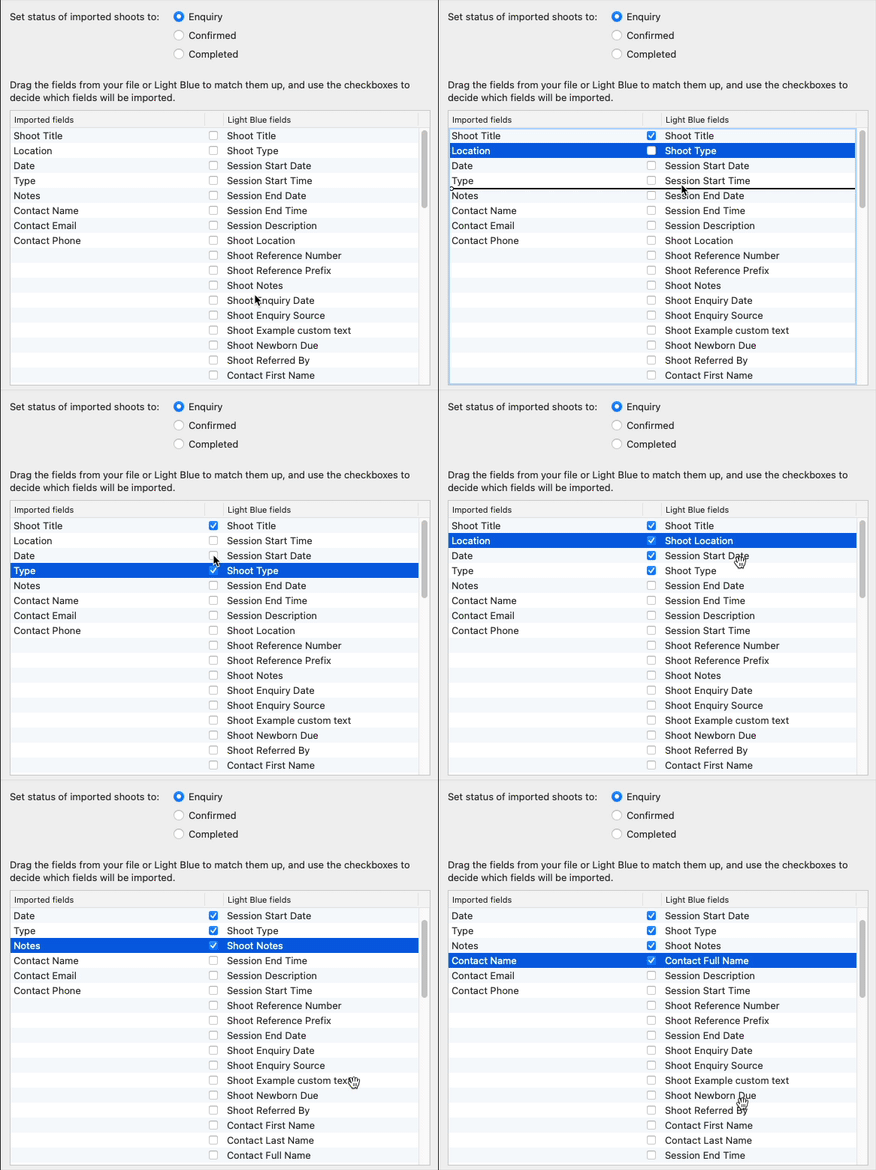
By dragging the fields up and down you can match them with the relevant columns in your spreadsheet. A checked checkbox indicates that column will be matched with the field during the import.

Light Blue’s assuming that all shoots have the same status (i.e. they’re all confirmed shoots, or enquiries, or completed, but not a mixture). If your spreadsheet contains a mixture of enquiries and confirmed shoots, we’d recommend saving two spreadsheets, one of just enquiries, one of just confirmed shoots, then import each one in turn.
List of fields
Here’s a list of the Light Blue fields that can me matched to columns in your spreadsheet:
- Shoot Title
- Shoot Type
- Session Start Date
- Session Start Time
- Session End Date
- Session End Time
- Session Description
- Shoot Location
- Shoot Reference Number
- Shoot Referene Prefix
- Shoot Notes
- Shoot Enquiry Date
- Shoot Enquiry Source
- Shoot Referred By
- Contact First Name
- Contact Last Name
- Contact Full Name
- Contact Maiden Name
- Contact Title
- Contact Job Title/Role
- Contact Birth Day
- Contact Birth Month
- Contact Birth Year
- Contact Birthday (as dd/mm/yyyy)
- Contact Notes
- Contact Type
- Contact Company
- Contact Address 1
- Contact Address 2
- Contact Address 3
- Contact City
- Contact County
- Contact Post Code
- Contact Country
- Contact Email Address (options for Home, Work, Other)
- Contact Phone Number (options for Mobile, Home, Work, Other)
- Contact Web Address ( options for Facebook, Twitter, LinkedIn, Home, Work, Other)
Hello, Is there any way you can add a task to a set of data, once imported without having to do it individually? Many thanks, Kirsty