Search for answers or browse our knowledge base.
Can't find the answer you need here? Contact our support team and we'll gladly help you.
🎥 Overview of a shoot record
Your photography business is built on the shoots that you do for clients, so Light Blue organises everything around shoots.
To add a new shoot from wherever you are in Light Blue, click the “New Shoot” button in the toolbar.
There’s lots of useful information on the shoot detail view, but there are a few bits of especially important information that we want to highlight.
Contact details
It’s important to record your client’s details so that you know who you’re doing this job for and so that you can get back in touch with them.
You can link as many contacts as you like to a shoot. e.g. for a family portrait you can list each member of the family separately, or for a wedding you should add the couple as separate contacts. You can always add those extra contacts at a later stage though.
To add a contact to a new shoot:
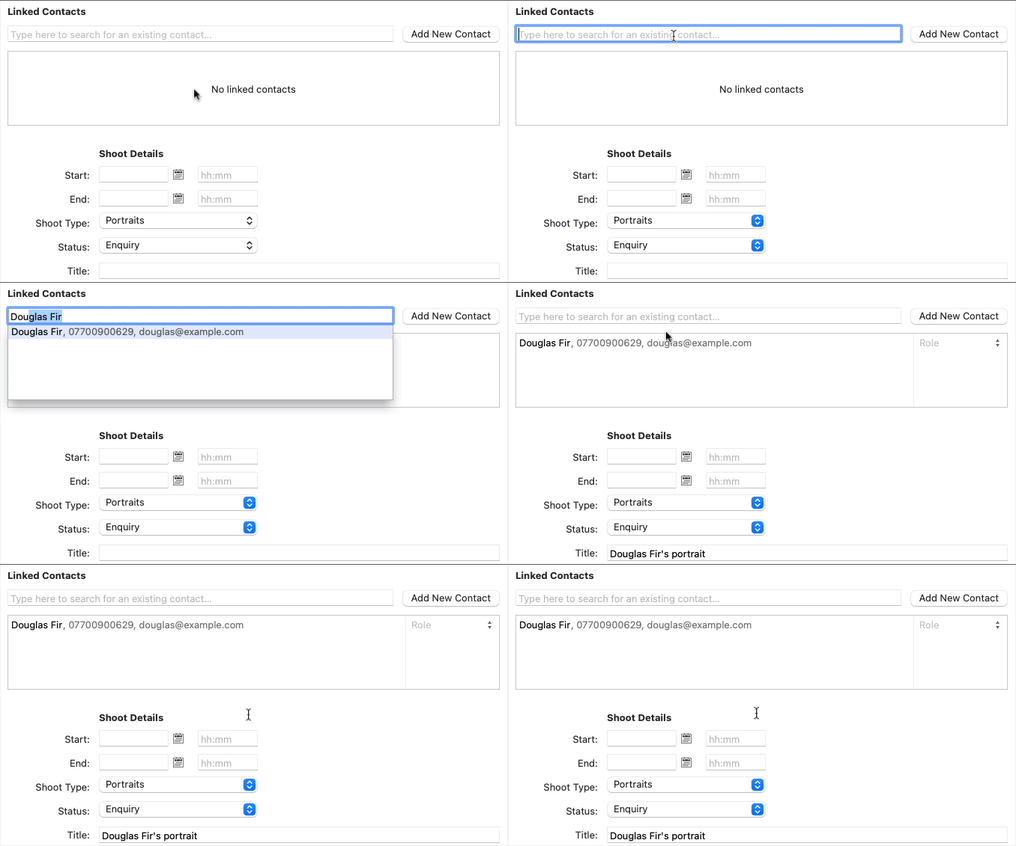
When creating a new shoot you can add a contact to the shoot right away by typing their name in the Linked Contacts box. If the contact is someone you’ve worked with before then we’ll offer to link their existing contact record.

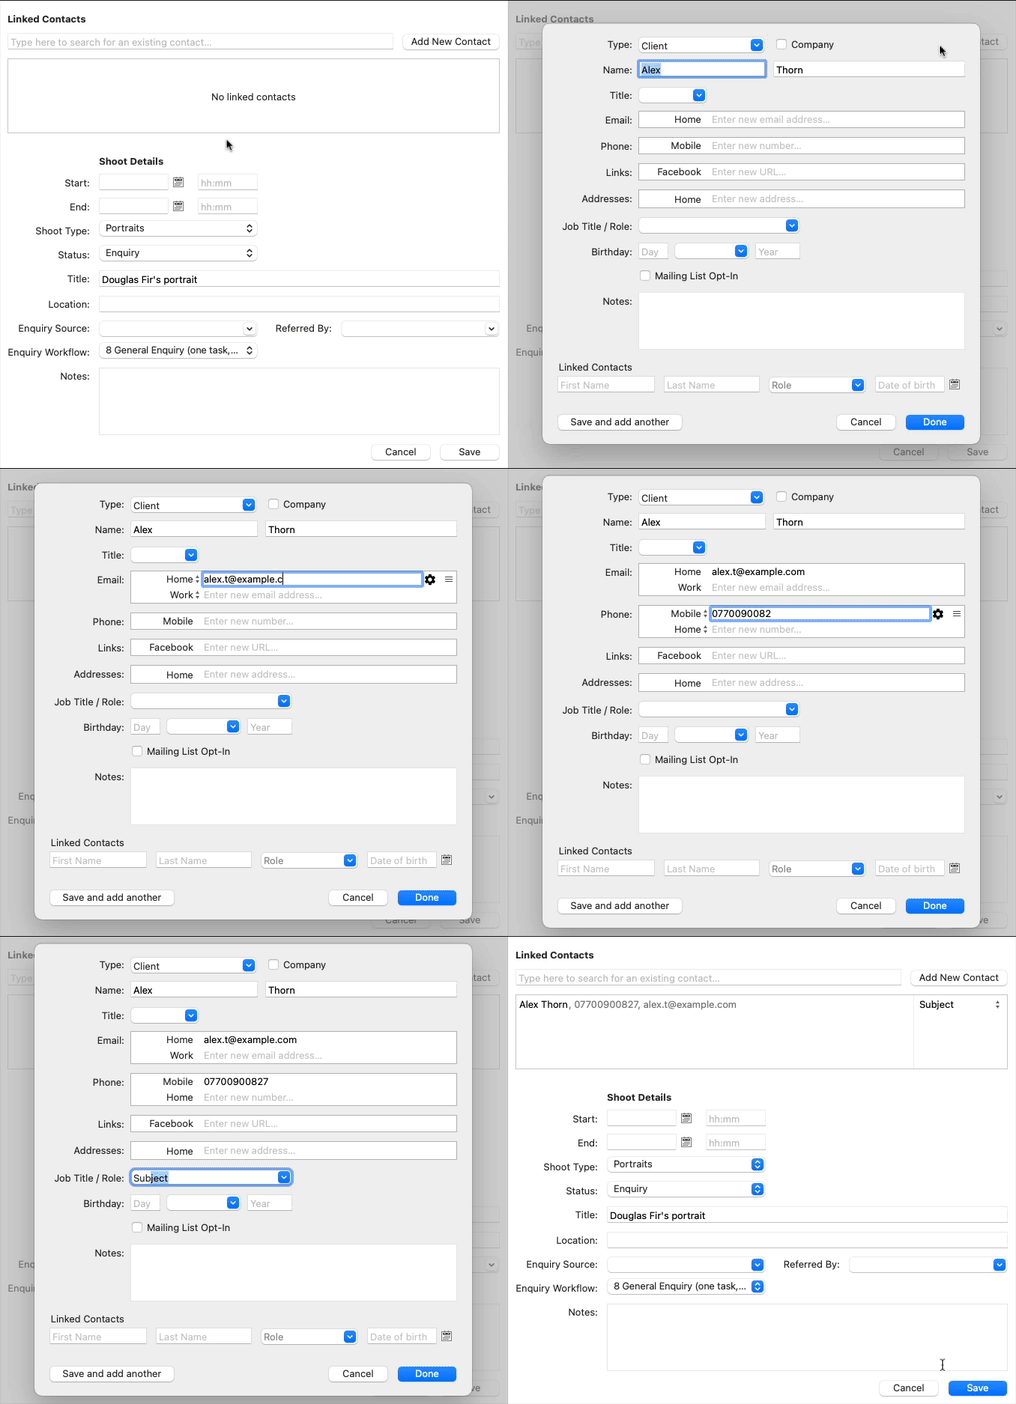
If you’re adding someone new then you can click on the “Add New Contact” button. That will open a new screen where are you can quickly add details about the contacts who are linked to the shoot.

You can add as many contacts to a shoot as you like and you can add more details to the contact record(s) later.
To add a contact to an existing shoot:
- In the “Linked Records” panel, click the + button.
- If this is a client you’ve already worked with, select the “Existing Contact” option to search your database and link their contact details to this new shoot.
- If it’s a new client, select the “New Contact” option and enter their details.
Shoot type & status
You can use shoot types to group your bookings together and get Light Blue to do useful things like apply different branding or workflows. You can find out more about setting up shoot types in this article.
We’re an optimistic bunch, and like to think of enquiries simply as shoots which haven’t been confirmed yet. When you create a new shoot, we set the status to “Enquiry” but you can change that when your client confirms their booking. You can find out more about shoot statuses in this article.
Dates & times
If your client has a date in mind for the shoot, you enter that in the “Date” section. Light Blue will automatically detect any clashes with any other events in your database and highlight the date that you enter in red if it clashes with a confirmed booking, or orange if it clashes with an enquiry.
There is also an option to highlight shoots and appointments that are scheduled outside of your business hours. If the event clashes with another confirmed or unconfirmed event then that colour-coding takes priority, otherwise out-of-hours events are highlighted in purple / pink on the Home screen, Shoot records list, and Activity panel. You can set your business hours in the ‘General’ section of the Preferences window (on the Home, Activity & Calendar tab), and if you want to turn this feature off you can do so by un-checking the ‘Highlight out of hours events’ option.
Other information
Shoots are central to everything that you do in Light Blue, so we’ve grouped together a set of articles that explore how Light Blue can help to you manage them.